Before I got my own classroom, I had taught in pretty much every space imaginable. Not just general music. Also choir and BAND. (Yes, BAND on a cart).
With this much experience, I’ve developed a few tricks to help me out you may want to try. With this in mind, here are my favorites hacks for teaching music on a cart.
My Experience Teaching Music On A Cart
I can’t even count the rooms I’ve taught in, but I have actually held music class in:
- Shared Spaces – multipurpose rooms/aftercare rooms/shared music room/music room where I was the ‘sub’ for a year.
- Classrooms — lots and lots of classrooms
- The ACTUAL church space
- A multipurpose room for a church where members would sometimes be doing stuff on the other side of the room talking loudly while I was teaching K-2…with some preschoolers in the mix….yeah…I know.
- Montessori classrooms with doors (these were the easiest)
- Montessori classrooms where the building was completely open except walls that went up to separate the rooms but didn’t go as far as the ceiling, so you could literally hear EVERYTHING going on in the ENTIRE building…and sometimes kids would still be working, and the tech teacher was teaching other kids too and there was a guy teaching DRUM LESSONS WHILE I WAS TEACHING…! And the kids were missing recess while they were in music class on top of it. .
- On a cart in one room
- On a cart in multiple rooms
- A church basement
- A “multipurpose” room with too many tables and chairs for the itty bitty room and no where to put them.
- A chapel next to the church but had lots of religious paraphernalia and a glass wall looking into the church so the kids didn’t feel comfortable making lots of noise….(I know…)
- Portables
- A large room with multiple entrances, behind a moveable wall, but people would walk through talking.
- A commons area for a church where people and classes would pass by while I was teaching.
- My personal fav, a library —- a pocket-sized, itty bitty school library with large tables and a floor that shook when you walked on it. The kids couldn’t even sit in a normal shaped circle on the floor and there were 9 of them.
- Sometimes I would get booted out of these spaces because of something going on that couldn’t be helped.
Four Different Schools
Sorry. Let me digest that for a minute. I’d like to mention that at one point I was in FOUR schools and teaching in more than one of these in some of the schools. I’d also like to point out that NONE of the worst scenarios above were in my current school.
As of right now writing this post, I have just finished year 10, and for 2 years, I’ve had my own room, so these scenarios all happened in 8 years of teaching.
I completely sympathize with this of you reading this looking for an idea if you might be/know you are losing your room this fall because of COVID.
Band on a cart.
Easy Hacks For Teaching Music On A Cart
(Full disclosure: Some affiliate links are in this section, which means I may earn a small kickback at no extra cost to you if you end up buying something.)
Hack Your Cart
- If you have a choice of carts but don’t have a big budget, don’t do an ed cart – get a tool cart. The wheels on the cheapie cart I had from a school supplier kept breaking and I got irritated so I bought my own. It was perfect for my needs, has lockable drawers (good to keep people out of certain things) and was also had lots of space on the bottom. This is the one I have. I am making NO money off this link but it is AMAZING and I would buy it again in a second. It lasted so well that I kept it and use it in my office now as extra storage. It’s also magnetic which is great to hang pocket charts on!
- Get a cup holder or zip tie a cup holder to your cart. It will help your water bottle/coffee cup/microphone not bite the dust in the hallway on that loose tile or over the strip in the doorway.
- If you can, zip tie or otherwise attach a pocket chart (this one is magnetic!) to the side for extra storage, class sets of manipulative like popsicle sticks, rhythm cards, bingo chips, etc.
- Apparently I like shopping in the tool area, but this tool tote is great for all the little things: cords, your recorder, slide whistle, yarn, tuning fork, pens/pencils, dry erase markers, magnets, and all those little things that you need that you don’t want rolling around. Check out a blog post I wrote about it here.
- Get a good speaker. I love this little JB Flip speaker because you can link multiple if you really need a lot of sound but it’s pretty loud by itself. It’s also water-resistant.
- Get a magnetic hook or something on the cart to attach your keys and other neck things to in case of extreme movement.
- Use velcro to attach lightweight things (boomwhackers) to your cart.
Be Prepared for the Ridiculous
- Always keep a ‘backup‘ on the cart – an extra book, a game the kids know well, manipulatives for your favorite games (like a button, a key, parachute cord instead of rope for games like Yo Ho I Pulled the Anchor, or carts for a game like Four Corners). Something will come up and you will have nothing to do and no way to get it.
- Plot types of lessons. Don’t plan centers with one grade and instruments with another on the same day. Especially different types of instruments with every grade.
- Put all your cord adapters in a pencil case and make sure they are all labeled with your name. And duct tape. In a really loud, colorful print. You won’t lose them and you’ll know if someone ‘found it plugged in and thought it was theirs’.
- Keep a file box on the cart with copies of papers for your sub. Don’t leave it in the room you store your stuff because they won’t find it and then they’ll end up playing musical chairs.
- Make sure your instruments cannot slide out of the container they are in.
Plan Ahead
- Post a sign where you keep your cart with your “check before you gos” – walkie talkie, keys, dry erase markers, cords.
- Keep a foldable/packable tote bag or backpack on the cart in case all of a sudden you have to carry something that won’t fit on the cart or doesn’t restock the same way.
- Keep an all purpose puppet on the cart.
- Always have a ball for games, practicing lyrics for concerts, etc.
- Body percussion is your friend.
- Small ribbon wands or scarves are great for in place dancing. They definitely add flair without a lot of space.
- Small instruments are easier: egg shakers, and rhythm sticks are my favs because you can usually make sure you have one for each kid without a lot of space.
- Make a master copy of all of your use every year things for each class and put them in a file box so you can copy on the go.
- Put a keyboard cover on your laptop. You will spill coffee on your keys. It will save your computer. (This is from experience. Multiple times. The most recent was when I was about to present at 3 hour workshop and I poured my latte on my computer).
- Keep a list of games that you know that don’t involve a lot of movement.
- The less you have to carry the better – use your tech! I WISH I had known about Virtual Classrooms when I was on a cart. Make one room for each grade/class and link to your main room. Link everything you need each week and then pull up that main room in the classroom and you won’t have to hunt for stuff and it will be accessible in whatever room you are in.
- Time yourself – between rooms, to the closest restroom, to your closet/storage area, and the copier.
When to Use The Classroom Teacher
- Set an expectation of where the kids should be when you arrive or where they will go. Have them help the transition to your class by always starting in that spot.
- Have a clear signal to start class. Let them chat for 30 seconds while you get set up, then ring a bell or chime so they know it’s time to stop talking. Don’t wait for them. They lost their get up and move time too so let them have a moment to get there.
- Make sure the kids know that you are in charge during class and they cannot ask the classroom teacher for anything during this time (restroom/water/my finger has a cut you can’t see and I need a bandaid).
- Make sure the classroom teacher knows too…
- If you need whiteboard space, communicate that before your first class. Don’t surprise the teacher the first day.
- Make sure you know login info for smart boards or anything else you’ll need.
- Find out what weird technology is in one random room that will need a special adapter.
- The emergency things will be the most important. Figure out where the teacher keeps emergency cards, bandaids, wipes, gloves, etc., where the phone is, the specific classroom procedures for fire drills, lock downs, tornado drills, and those sort of things. Review with the kids even though they are in their own space. They will need the refresher with another teacher in front of them.
Use the Kids!
- Assign jobs in each class: board cleaner, desk crew (moves the desks), pass out crew, assistant of the week, etc. so the kids will take care of some set up stuff.
– Board Cleaner
– Moving Crew (moves furniture/chairs)
– Pass Out Crew
– Assistant Teacher (Do this one by week!) – great for answering the phone!
– Clean Up Crew - They are in their own room…you would think they would have a pencil. But in case, chat with the classroom teacher about using the supplies in the room like pencils, crayons, dry erase markers so you don’t have to carry some.
Your Sub Will Thank You
- Put a daily (Monday, Tuesday, Wednesday…etc) packet together
- Keep a map for them – or write out directions. For example: leave Mrs. Smith’s room, turn right, go to the end of the hall, turn left, Mr. Jones’ room is the 3rd door on the left.
- Include emergency worksheets for your sub on your cart in an obvious spot.
- Don’t have your sub move lots of furniture. Everyone will be happier.
- Make a virtual classroom for your sub. They will only have to pull up one thing and you can link it at home without having to take stuff in!
And BE FLEXIBLE
This might seem like it’s simple, but you attract more flies with sugar than water. If you complain for an entire year or however long this lasts, it’s not going to make life better for you.
No one wants to teach on a cart but the kids aren’t going to remember the ridiculousness that involves shoving instruments on a cart and moving desks (well maybe – but not negatively!).
They’re going to remember how much fun, what they learned and the time they enjoyed with you in your class.
Check out my Cart Tour here.
Hope these hacks for teaching music on a cart have been helpful!


I am looking forward to getting the newsletter! I keep coming across your posts on Facebook! Thank you!
Awesome! I promise to not overwhelm your inbox! 🙂
Thank you. I’m a General Music Teacher (born and raised in Metro-Detroit, actually), living in Tucson, Arizona and I thought I had finally escaped The Cart. I was on it for one year a while back, and thought about quitting the field. I did end up quitting the district which put me on the cart and was very happy in my current district and my well lived-in classroom/Kingdom/hoarder haven. Now after 5 years, Covid has doomed me back to the Cart. I cried at first, then canceled everything I had planned which needed independent space and started to dig through resources. I came across your page and found your attitude to be very uplifting. “It’s ok, no one likes this, you can do it, get up”. I know you didn’t say those words, but they were between the lines, and I really needed to hear them. Thank you. Next step: getting that cart because heaven knows the district will supply me with one from the Janitor’s closet if I don’t take care of it myself. Many thanks.
Yay from the D!
I’m SO happy that this post helped you out. And you TOTALLY can do it! Good luck and please reach out if I can help you in some way!
I went from 18 years on a cart (preK – 8) to a different school and 5 years in a music room, was told today I’d be back on the cart. I will admit I would rather have my room, but the thought of NOT having to clean everything and move chairs 8 times a day does have its attraction. We can get through this, we are music teachers, used to being flexible on a moment’s notice and thinking on our feet. Looking forward to your newsletter! Thank you!
So glad you found this helpful! It was nice to not constantly move chairs…We can totally do this!
Melissa, this is AMAZING! I still have no idea what my school is going to do, but cart teaching wouldn’t surprise me. Thank you for all of these amazing tips!!
Anytime! I’m so happy it was helpful!
Thanks for your help in thinking through the details that will make or break “life on a cart”!
So glad you found it helpful!!
Oh my goodness, this came at just the right time. I am so fortunate – I have had a room my entire 28 year career, although I share with the art teacher at my smaller school. I am 99% sure I’ll be on a cart now because of COVID. I’ve said for years that the year I get a cart is the year I retire, but under these circumstances, I understand why. So here I am, and I’ve been STRESSING SO HARD about it. This is immensely helpful. I’m looking forward to hearing what kinds of lessons work best in their classrooms. Thank you!
I’m so glad this was helpful!! You can totally make it work!
Melissa,
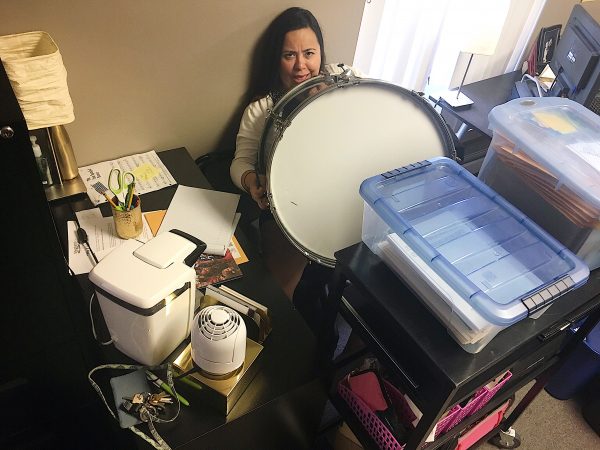
Thank you for so many great things to consider. I’ll be on a cart this year thanks to Covid-19 restrictions. I had not thought of the tool cart. Do you have any pics of your loaded cart or the cart in use during class? I’m trying to get an idea of how you might use that lifted lid as well as what the sizing is like. Thanks so much!!
I will take some when I get into school in a few weeks! The lid is actually really good for putting magnetic manipulatives on! I’ve used magnetic tape for that.
This is fantastic! I hadn’t thought about a tool cart, but it makes so much sense! Lots to think about, especially since I don’t know what my year is going to look like. Thanks so much for all the great ideas!
Glad this was helpful!!
I see another post has asked for a picture of your cart with all of the bells and whistles? I agree – that would be awesome! I will be searching for a cart. Thank you
I will definitely get one when I go in to school in a few weeks!
I am not able to access the cart link you posted. Are you able to repost the link to your cart(or something similar)? Thank you for the ideas on getting started…again! I have taught in 20+ buildings and one year it was in 6 different buildings. It’s tough getting used to each space.
Hi! Try this. https://www.harborfreight.com/tool-storage-organization/tool-storage/tool-carts/30-in-5-drawer-blue-mechanics-cart-64031.html
I hope it works. If not, send me an email and I’ll get you the link. I’m glad you thought the post was helpful!
Thank you so much for this helpful post! I too will be moving to a cart next year. Do you keep a keyboard on this cart? Thanks again.
I did not keep a keyboard on here. I don’t tend to use one at all except for choir and I was always in a room that had a piano for that.
Very helpful even if some things seem obvious, when we’re in the moment we don’t have time to think…”did I bring such and such”.
Although I will be using a cart this year, my students will not be able to touch each other (games) or any instruments except the ones they will make with me at the beginning of the year that are solely theirs. (Drums, rhythm sticks, shakers…).
Do you have ideas for that scenario? Thanks!
I’m so glad this was helpful. I do have more ideas. Here is a Pinterest board I’ve been making just for this sort of stuff. https://www.pinterest.com/MrsSMusicRoom/music-class-make-it/
Thank you for the ideas.
Glad they were helpful!
Thank you for your insight and sharing your experiences with teaching music on a cart.
I am extremely nervous and unsure about a lot of things this coming year but I can say that I am willing to meet the challenges I will face. I am trying to just keep positive and the focus on the experiences I can give my students.
Thank you
Glad I can be helpful! It’s definitely not idea, but it’s doable!